


Description
What our Measuring Liquid Volume lesson plan includes
Lesson Objectives and Overview: Measuring Liquid Volume teaches students how to measure liquid volume, including the units used. At the end of the lesson, students will be able to measure and estimate liquid volumes using standard units. This lesson is for students in 3rd grade and 4th grade.
Classroom Procedure
Every lesson plan provides you with a classroom procedure page that outlines a step-by-step guide to follow. You do not have to follow the guide exactly. The guide helps you organize the lesson and details when to hand out worksheets. It also lists information in the blue box that you might find useful. You will find the lesson objectives, state standards, and number of class sessions the lesson should take to complete in this area. In addition, it describes the supplies you will need as well as what and how you need to prepare beforehand.
Options for Lesson
Included with this lesson is an “Options for Lesson” section that lists a number of suggestions for activities to add to the lesson or substitutions for the ones already in the lesson. One optional addition to this lesson is to have your students use different empty bottles to fill in order to measure volume such as travel sized bottles, shampoo or conditioner bottles, water bottles, or small juice boxes. You could also have your students bring in an empty bottle from home so that there are many to choose from in the classroom. For an additional activity, you could have your students measure the capacity of their mouths by filling their mouth with water and then depositing it into a graduated cylinder.
Teacher Notes
The teacher notes page includes lines that you can use to add your own notes as you’re preparing for this lesson.
MEASURING LIQUID VOLUME LESSON PLAN CONTENT PAGES
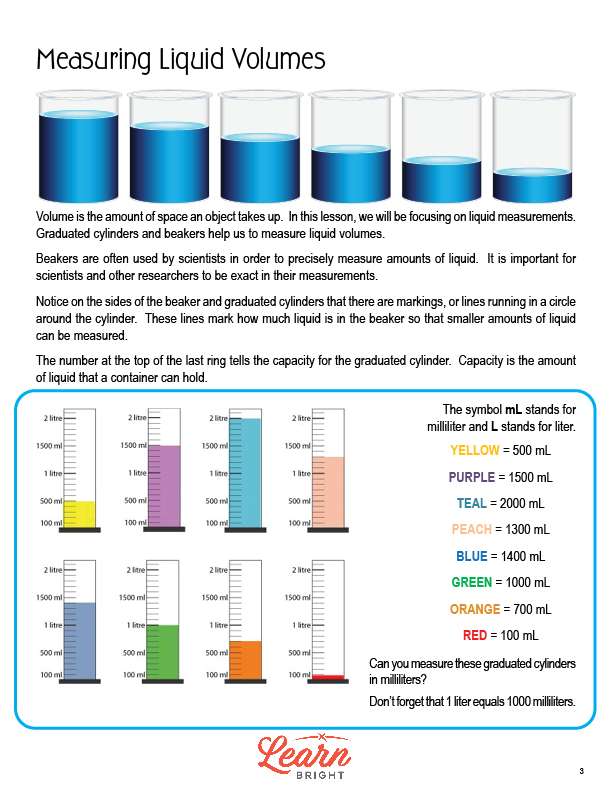
Measuring Liquid Volumes
The Measuring Liquid Volume lesson plan includes two content pages. Volume is the amount of space that an object takes up. Liquid volume the amount of space a liquid takes up. We use graduated cylinders and beakers to measure liquid volumes. Scientists often use beakers to precisely measure liquid amounts. They need to be accurate and precise in their measurements.
Beakers and graduated cylinders have markings, or lines, running in a circle around their cylinders. These lines mark the amount of liquid in the beaker. This allows us to measure smaller amounts of liquid. They also have a number at the top of the last ring that tells the capacity of the graduated cylinder. The capacity is the total amount of liquid that a given container can hold.
The lesson shows pictures of different graduated cylinders with different amounts of liquid in them to illustrate how to use them to measure liquid volume. Graduated cylinders usually measure liquids in milliliters (abbreviated to mL), but there are other units that we use to measure liquids as well.
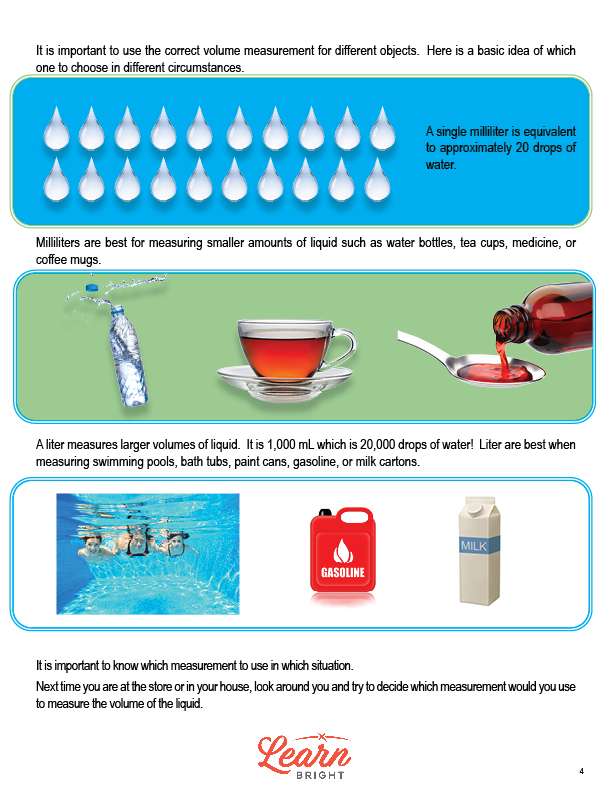
It’s important to use the correct volume measurement for each object you measure. For liquid measurement, we use either milliliters or liters. One milliliter is equivalent to about 20 drops of water and are best for measuring smaller amounts of liquid, like water bottles, tea cups, medicine, or coffee mugs.
Liters are best for measure larger volumes of liquid, like swimming pools, bath tubs, paint cans, gasoline, or milk cartons. One liter equals 1,000 mL or about 20,000 drops of water.
When measuring a liquid, make sure to think about whether milliliters or liters make more sense! As you walk around your house, try looking around and deciding which measurement you would use for each liquid you see.
MEASURING LIQUID VOLUME LESSON PLAN WORKSHEETS
The Measuring Liquid Volume lesson plan includes four worksheets: an activity worksheet, a practice worksheet, a homework assignment, and a quiz. You can refer to the guide on the classroom procedure page to determine when to hand out each worksheet.
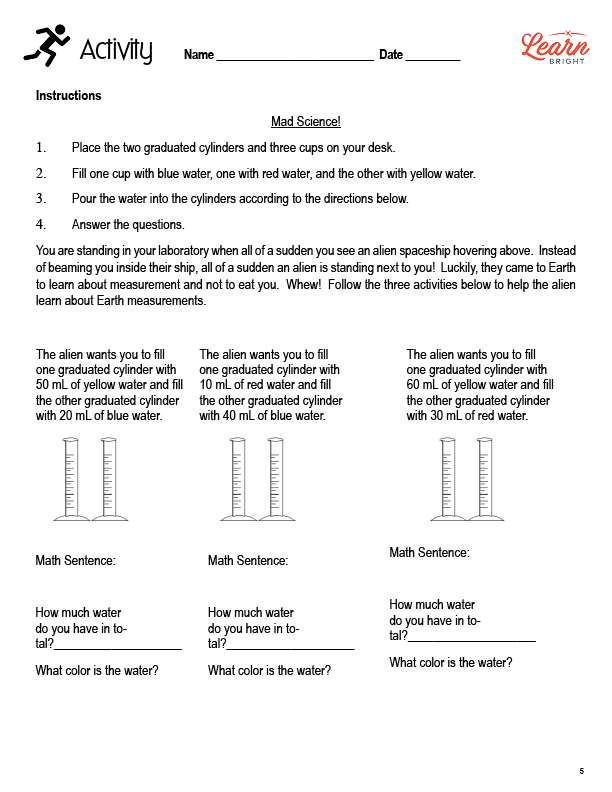
MAD SCIENCE ACTIVITY WORKSHEET
For the activity worksheet, students will first place two graduated cylinders and three cups on their. desk. Next, they will fill one cup with blue water, one with red water, and one with yellow water. They will then pour the water into the cylinders according to the directions on the worksheet. Finally, they will answer questions about the activity.
CHOOSING UNITS PRACTICE WORKSHEET
For the practice worksheet, students will color in or write the volume of the liquid shown in the graduated cylinders on the worksheet. They will then decide which unit is best to measure different amounts of liquid, like a glass of lemonade or a swimming pool. Finally, they will decide whether they would use milliliters or liters to measure the volume of different things, like a bucket and a can.
MEASURING LIQUID VOLUME HOMEWORK ASSIGNMENT
The homework assignment asks students to first color in or write the volume of the liquid shown in the graduated cylinders on the worksheet. Next, they will find five household items and decide whether they would measure them in milliliters or liters. Finally, they will write down the symbol for milliliters.
QUIZ
This lesson also includes a quiz that you can use to test students’ understanding of the lesson material. For the quiz, students will first name two items that can be measured using milliliters. Next, they will write down the symbol for liters. Finally, they will name two items that can be measured using liters.
Worksheet Answer Keys
This lesson plan includes answer keys for the practice worksheet and the quiz. If you choose to administer the lesson pages to your students via PDF, you will need to save a new file that omits these pages. Otherwise, you can simply print out the applicable pages and keep these as reference for yourself when grading assignments.


