
Description
What our Expressing Length lesson plan includes
Lesson Objectives and Overview: Expressing Length teaches students about measuring and expressing length with various units. At the end of the lesson, students will be able to express the length of an object as a whole number of length units that are laid end to end with no gaps or spaces. This lesson is for students in 1st grade.
Classroom Procedure
Every lesson plan provides you with a classroom procedure page that outlines a step-by-step guide to follow. You do not have to follow the guide exactly. The guide helps you organize the lesson and details when to hand out worksheets. It also lists information in the blue box that you might find useful. You will find the lesson objectives, state standards, and number of class sessions the lesson should take to complete in this area. In addition, it describes the supplies you will need as well as what and how you need to prepare beforehand. The supplies that you will need for this lesson include rulers, scissors, and paperclips.
Options for Lesson
Included with this lesson is an “Options for Lesson” section that lists a number of suggestions for activities to add to the lesson or substitutions for the ones already in the lesson. One optional addition to this lesson is to use a shoe to measure the length of the classroom or use a cut out handprint to measure the height of each student. You can also incorporate graphing with this lesson to keep track of items measured.
Teacher Notes
The teacher notes page includes a paragraph with additional guidelines and things to think about as you begin to plan your lesson. This page also includes lines that you can use to add your own notes as you’re preparing for this lesson.
EXPRESSING LENGTH LESSON PLAN CONTENT PAGES
Expression Length
The Expressing Length lesson plan includes three content pages. When you measure length, you can find out which objects are taller, shorter, smaller, or longer than others. You can look around and see some objects that are both taller and smaller than you.
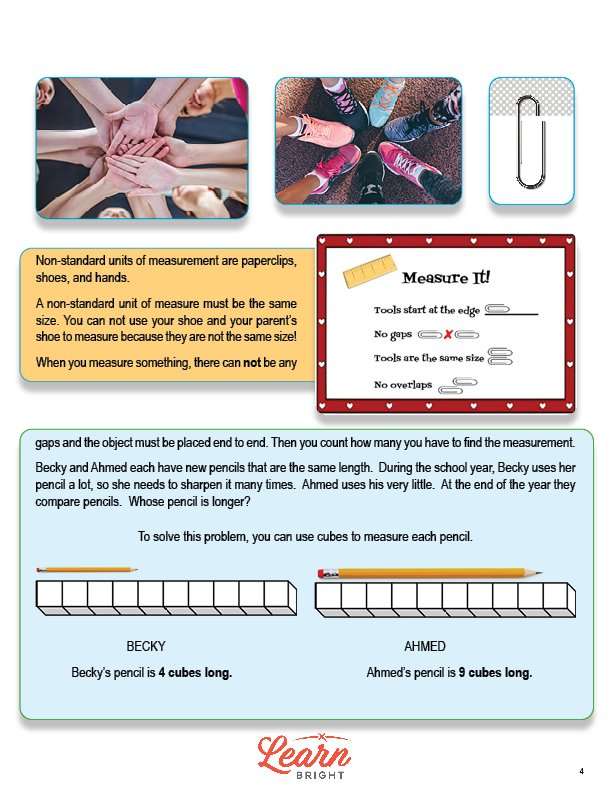
Sometimes we want to know exactly how tall or long something is. To be as accurate as possible, we need to use a specific unit of measurement. We have two types of units of measurement, standard and non-standard. Standard units of measurement are things like rulers and tape measures. Non-standard units of measurement are things like paperclips, shoes, and hands.
Non-standard units of measurement must be the same size. This means that you can’t use both your shoe and your parent’s shoe to measure because they’re not the same size. You have to only use one of your shoes. When measuring something, you need to make sure there are no gaps and that your objects are placed end to end.
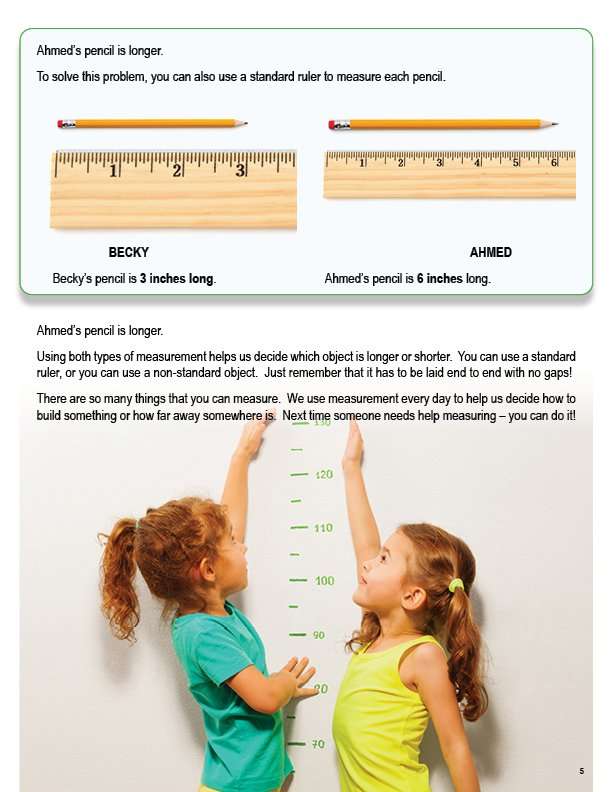
The lesson includes an example. Say two people have new pencils that are the same length. One person uses their pencil a lot and the other person does not. At the end of the year, they want to compare their pencils to see whose is longer. To solve, you could use cubes to measure the pencils. The first person’s pencil is 4 cubes long, and the second person’s pencil is 9 cubes long. The second person’s pencil is longer! You could also solve this problem using a standard ruler, which measures in inches.
Either type of measurement will tell us which object is longer. Either way, you need to make sure that your objects have no gaps. Using this knowledge, you can measure and compare so many different things! We use measurement every day to help us make decisions and gather information.
EXPRESSING LENGTH LESSON PLAN WORKSHEETS
The Expressing Length lesson plan includes three worksheets: an activity worksheet, a practice worksheet, and a homework assignment. You can refer to the guide on the classroom procedure page to determine when to hand out each worksheet.
EXPRESSING LENGTH ACTIVITY WORKSHEET
The activity worksheet asks students to measure objects around the classroom using both paperclips and inches.
MEASURING PRACTICE WORKSHEET
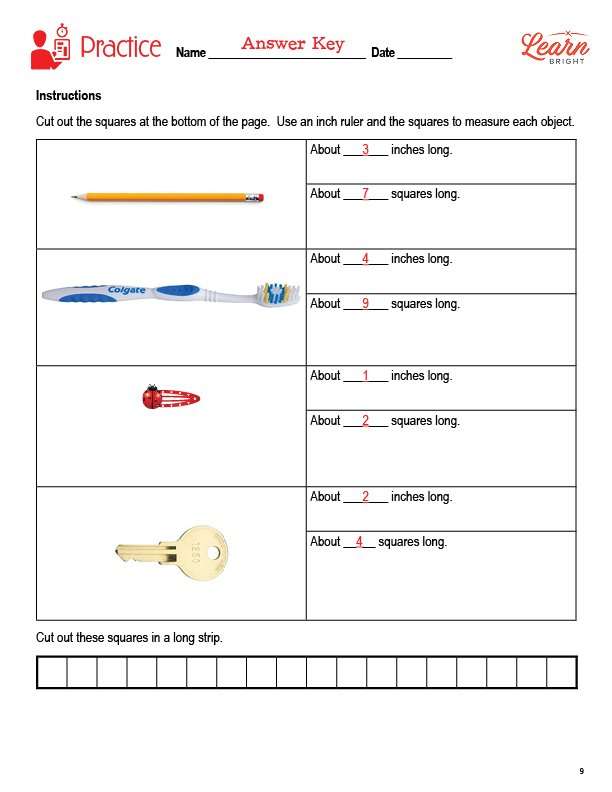
For the practice worksheet, students will cut out the squares at the bottom of the worksheet. They will then measure each object printed on the worksheet with both a ruler and the squares that they cut out, recording their answers on the worksheet.
PAPERCLIPS HOMEWORK ASSIGNMENT
The homework assignment asks students to use paperclips to measure different objects around their house. They will draw a picture of each object or write the word and measure the length.
Worksheet Answer Keys
This lesson plan includes an answer key for the practice worksheet. If you choose to administer the lesson pages to your students via PDF, you will need to save a new file that omits these pages. Otherwise, you can simply print out the applicable pages and keep these as reference for yourself when grading assignments.