

Description
What our Human Lungs STEM lesson plan includes
Lesson Objectives and Overview: Human Lungs STEM explains how this important organ functions within the human body. Students will discover how the respiratory system works with other body systems. They will also learn about the exchange of carbon dioxide and oxygen within the lungs. This is a lesson for students in 4th grade, 5th grade, and 6th grade.
Classroom Procedure
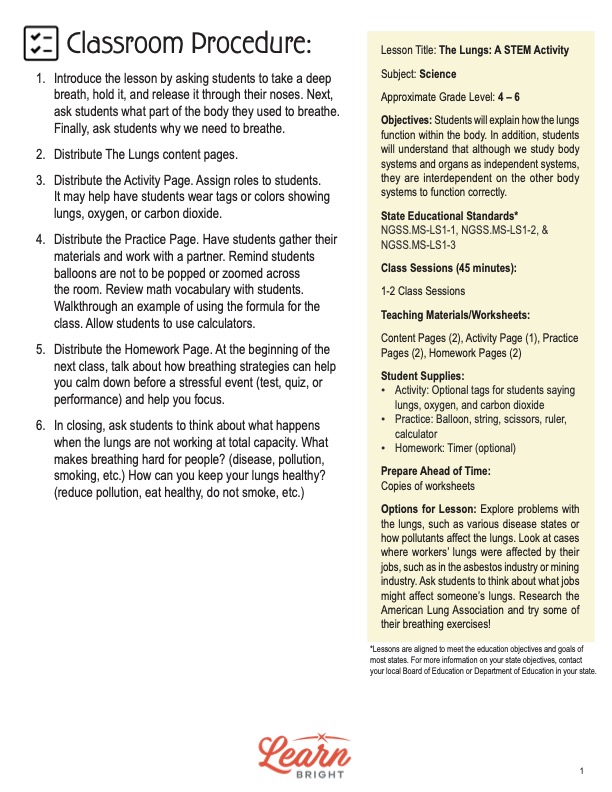
Every lesson plan provides you with a classroom procedure page that outlines a step-by-step guide to follow. You do not have to follow the guide exactly. The guide helps you organize the lesson and details when to hand out worksheets. It also lists information in the yellow box that you might find useful. You will find the lesson objectives, state standards, and number of class sessions the lesson should take to complete in this area. In addition, it describes the supplies you will need as well as what and how you need to prepare beforehand. The activity does not require any supplies, per se, but you may choose to provide grey, blue, and green tags to correspond to the assignments you will give students. For the practice worksheet, you will need balloons, string, scissors, rulers, and calculators.
Options for Lesson
In the “Options for Lesson” section of the classroom procedure page, you will see some suggestions for additional activities or ideas to add to the lesson if you want to. One idea is to explore problems that can happen with the lungs, such as various disease states, or how pollutants affect them. Another option is to look at actual cases in which workers’ lungs were affected by their jobs, such as in the asbestos industry or mining industry. Along the same lines, you could ask students to think about jobs that might affect someone’s lungs. One more suggestion is to have students research the American Lung Association and try some of their breathing exercises.
Teacher Notes
The teacher notes page provides an extra paragraph of information to help guide the lesson and remind you what to focus on. It suggests pairing this lesson with a math or science lesson and bring in elements of social-emotional learning as an added bonus. The blank lines on this page are available for you to write out thoughts and ideas you have as you prepare the lesson.
HUMAN LUNGS STEM LESSON PLAN CONTENT PAGES
Intro to the Lungs
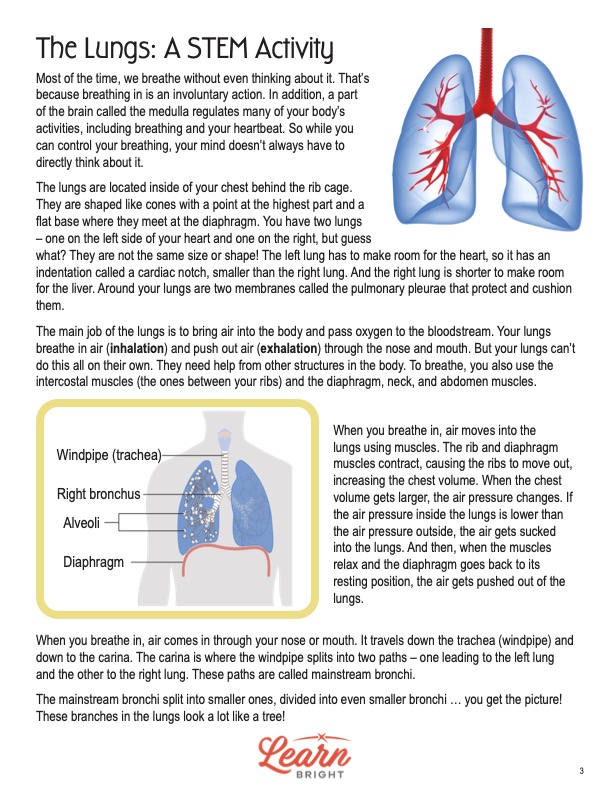
The Human lungs STEM lesson plan contains two content pages. Most of the time, we breathe without even thinking about it. That’s because breathing in is an involuntary action. In addition, a part of the brain called the medulla regulates many of the body’s activities, including breathing and heartbeat. So while we can control our breathing, our mind doesn’t always have to directly think about it.
The lungs are located inside of the chest behind the rib cage.
They look like cones with a point at the highest part and a
flat base where they meet at the diaphragm. We have two lungs—one on the left side of the heart and one on the right. However, they are not the same size or shape! The left lung has to make room for the heart, so it has an indentation called a cardiac notch. This makes it overall smaller than the right lung. And the right lung is shorter to make room for the liver. Two membranes called the pulmonary pleurae surround the lungs and protect and cushion them.
Our lungs have a really important job: to bring air into the body and pass oxygen to the bloodstream. Lungs breathe in air (inhalation) and push out air (exhalation) through the nose and mouth. But our lungs can’t do this all on their own. They need help from other structures in the body. To breathe, we also use the intercostal muscles (the ones between your ribs) and the diaphragm, neck, and abdomen muscles.
How We Breathe
Students will learn that when we breathe in, air moves into the lungs using muscles. The rib and diaphragm muscles contract, causing the ribs to move out and increasing the chest volume. When the chest volume gets larger, the air pressure changes. If the air pressure inside the lungs is lower than the air pressure outside, the air gets sucked into the lungs. And then, when the muscles relax and the diaphragm goes back to its resting position, the air gets pushed out of the lungs.
When we breathe in, air comes in through your nose or mouth. It travels down the trachea (windpipe) and down to the carina. The carina is where the windpipe splits into two paths. One leads to the left lung and the other leads to the right lung. These paths are called mainstream bronchi. The mainstream bronchi split into smaller ones, which then divide into even smaller bronchi, and so on. In fact, these branches in the lungs look a lot like a tree!
Eventually, the branches end, and instead of leaves, there are alveoli, which are tiny air sacs. The walls of the alveoli are super thin and lined with capillaries. Capillaries move oxygen to the bloodstream and pull carbon dioxide to release when during exhalation. When oxygen and carbon dioxide exchange in the alveoli, this is called internal respiration. The process of moving oxygen into the body and carbon dioxide out of the body as we breathe is called external respiration.
HUMAN LUNGS STEM LESSON PLAN WORKSHEETS
The Human Lungs STEM lesson plan includes three worksheets: an activity worksheet, a practice worksheet, and a homework assignment. These worksheets will help students demonstrate what they learned throughout the lesson and reinforce the lesson concepts. The guide on the classroom procedure page outlines when to hand out each worksheet to your students.
BREATHING SIMULATION ACTIVITY WORKSHEET
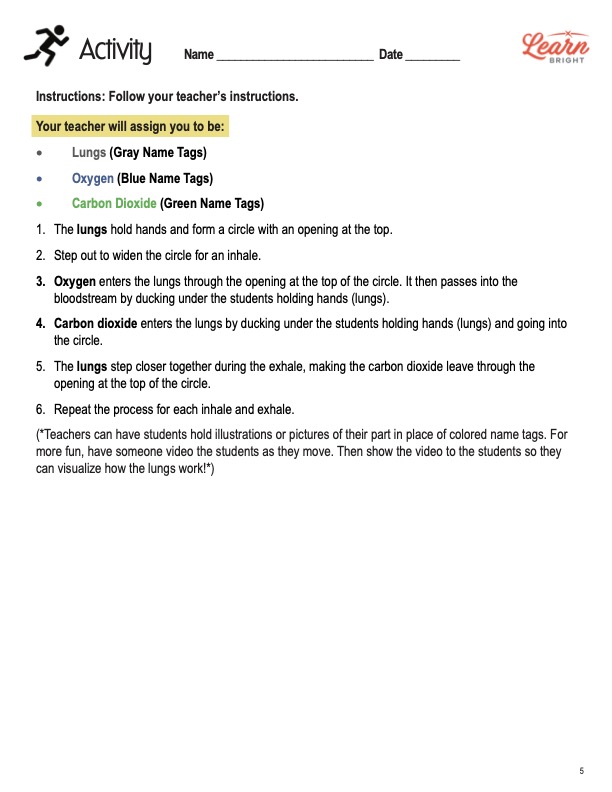
You will assign students to be either lungs, oxygen, or carbon dioxide. Use gray name tags for lungs, blue name tags for oxygen, and green name tags for carbon dioxide. Students who represent lungs will form a circle by holding hands but leave an opening at the top. They will step out to widen the circle for an inhale. At that point, oxygen students will enter the “lungs” through the opening at the top of the circle.
Then the oxygen will leave the lungs and “pass into the bloodstream” by ducking under the students’ hands in the circle. Carbon dioxide students will then enter the lungs the same way, by ducking beneath the circle of arms. Then the studnets in the circle will step closer together to represent an exhale. The carbon dioxide students will then leave through the opening at the top of the circle.
You can have students repeat this process over and over and reassign them different tasks. You might also choose to have students hold illustrations of their part in place of name tags. If you want, you could also have someone record the students on video and show the video to the class so they can visualize how lungs work!
BALLOON TIME PRACTICE WORKSHEET
Students will work with a partner to complete this assignment. Each student will take a balloon and stretch it out. After they take a deep breath, they will blow into the balloon using all of the air in their lungs. They only get to blow into the balloon once. They will then hold the balloon closed or tie it off if they can. Their partner will measure the circumference of the balloon using a string and record the number.
At this point, students will fill in the volume formula and calculate the volume of their own lungs. The chart on this page provides the necessary components of the calculation as well as the formula itself. Students will plug in the variables to find the volume of their lungs. Then students can compare their volumes. They will respond to the prompt at the bottom of the page to explain why they think lung capacity between students varies.
HUMAN LUNGS STEM HOMEWORK ASSIGNMENT
For the homework assignment, students will read a passage about breathing and meditation. Then they will follow the directions in the bulleted list. When they finish, they will respond to the three prompts at the bottom of the page.
Worksheet Answer Keys
There are answer keys for both the practice and homework worksheets. Given the nature of both assignments, students responses will vary. However, the answer keys provide sample responses for reference. If you choose to administer the lesson pages to your students via PDF, you will need to save a new file that omits these pages. Otherwise, you can simply print out the applicable pages and keep these as reference for yourself when grading assignments.


